Should my child be learning proper art skills, or just being creative?
22 October 2026
A parent said something to me recently that I haven’t stopped thinking about. They weren’t sure the skills their child was learning in our classes actually went anywhere. Did any of it carry over to the art their child made at home? Did it matter outside the art room at all?
It’s a fair question. If you’ve ever looked at a painting your child brought home and wondered what the point was, you’re not the only one. So this one’s for you, whether your mini-artist comes to our Gold Coast studio or you’ve never heard of us.
That question usually sits inside a bigger debate, and I talk to parents on both sides of it. Some want their mini-artists learning real art skills and techniques, solid foundations that make them a better artist. Others want them free to create without drilling a technique (they’ll pick it up eventually if they experiment enough, right?).
Here’s where I land after eleven years of running a studio: you shouldn’t have to choose. And when kids get both at once, that’s when the skills start travelling home with them.
Every term, we plan projects where kids learn a proper skill and pour their own open-ended creativity into that very same piece. They learn the “rules” a classic technique follows, then bring their own magic to it and experiment outside the boundaries of that rule. The skill and the imagination grow together, inside one piece of work they care about. Here are two projects from last term that show what that looks like, and how each one reaches well beyond the art table.
Letterbox Street
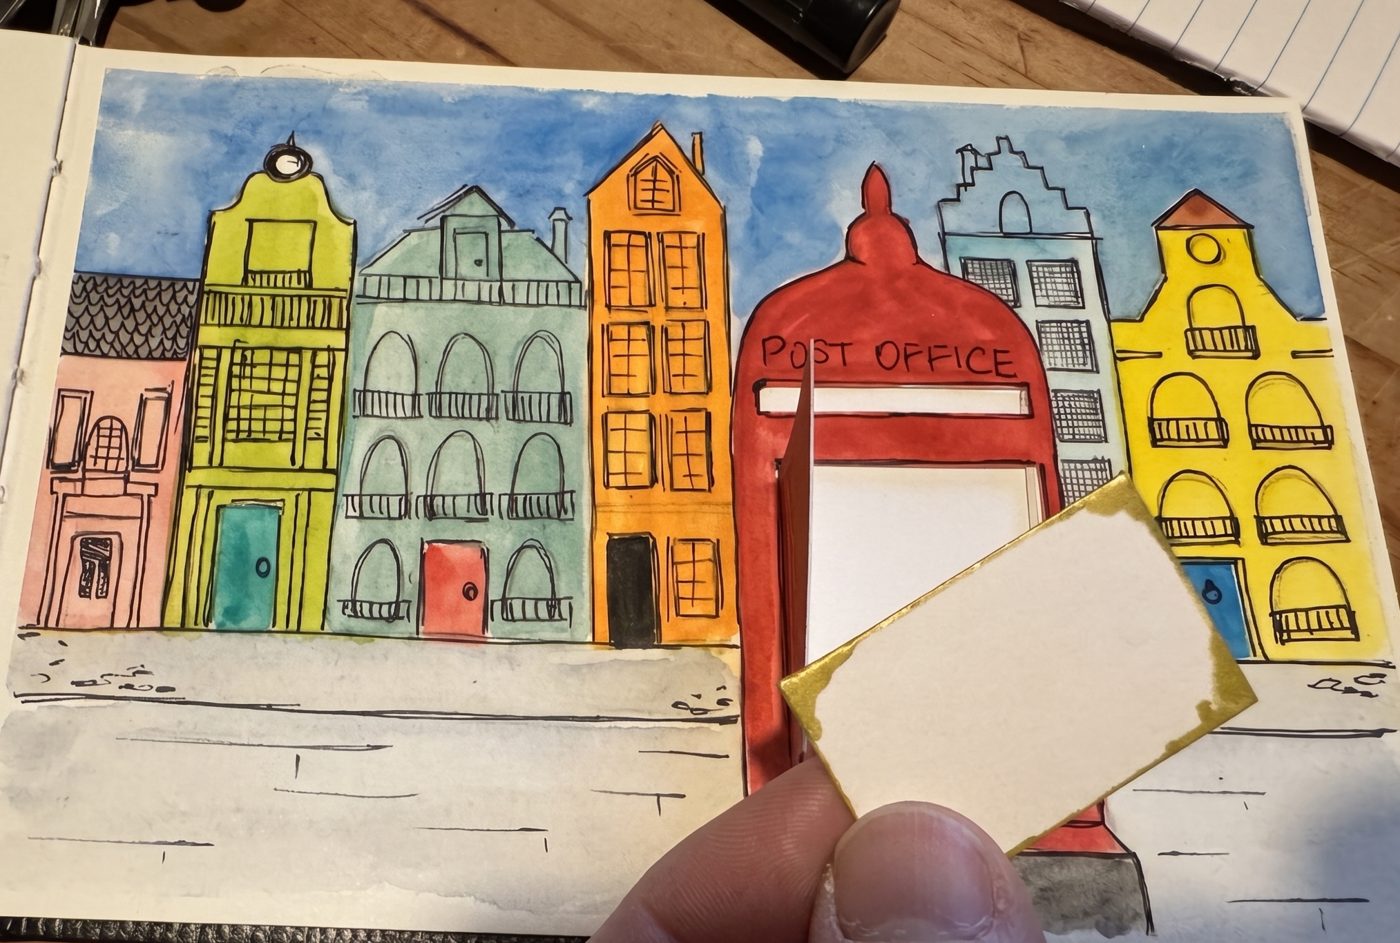
Last term, the mini-artists painted an interactive artwork we called Letterbox Street. It was packed with traditional watercolour techniques, sketching techniques and planar perspective. That’s the technique of layering a scene so it has depth, with things set behind one another. They learned how objects look bigger up close and smaller further away. We worked step by step through placing the shapes of the buildings, the road, and a letterbox with a slit in it (to post tiny mail, of course!), all by the rules of perspective.
Then came the most fun part. We looked at reference pictures of a London street, some fairy houses and some goblin houses, and asked the kids to turn their basic shapes into a street full of personality. Most started by copying one or two of the reference designs. By the end, every single one of them was adding their own little design touches. Some veered right off track and made alien streets, spooky streets, a minion street and even a cake street!
This project was all about theming. If a child wanted a fairy street, they had to work out what makes something look like a fairy street, then pull all those elements together. That’s categorical thinking, and it reaches so far beyond art. Sorting ideas into themes helps with tidying a bedroom, planning a school essay, even doing a budget as an adult. Art just happens to be a wonderful way to practise it.
You can try this at home with nothing more than paper and a pencil. Pick a theme together (underwater, outer space, a street where only cats live) and ask your child what would make a house belong there. You’ll hear the thinking happen out loud.
Mini Art Galleries
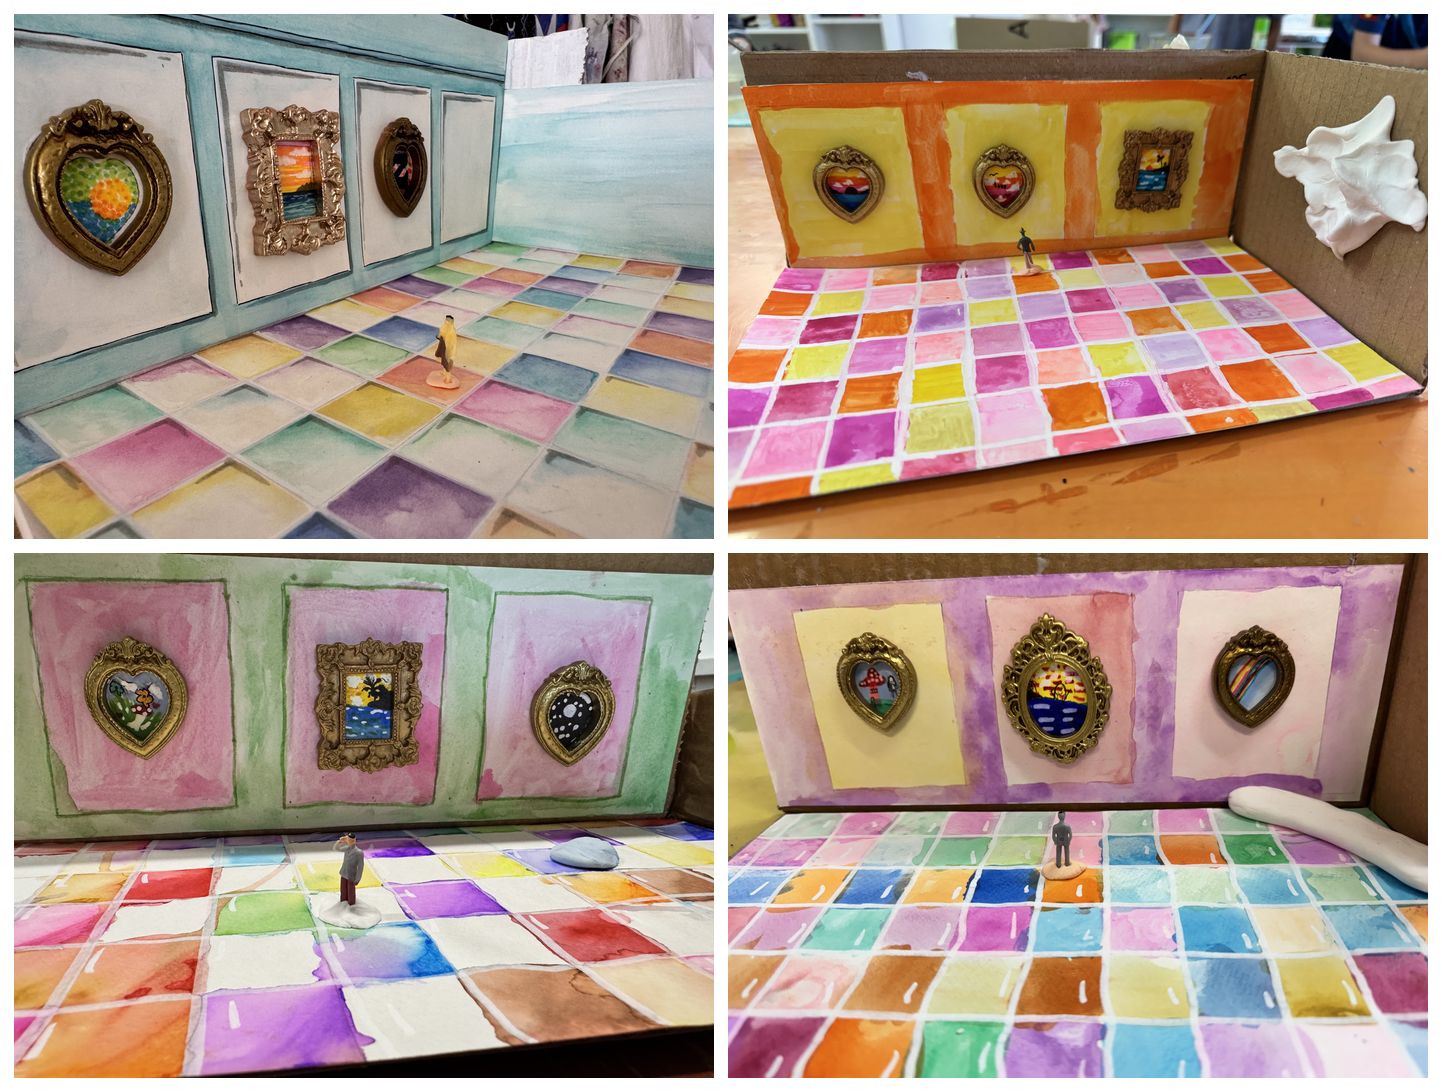
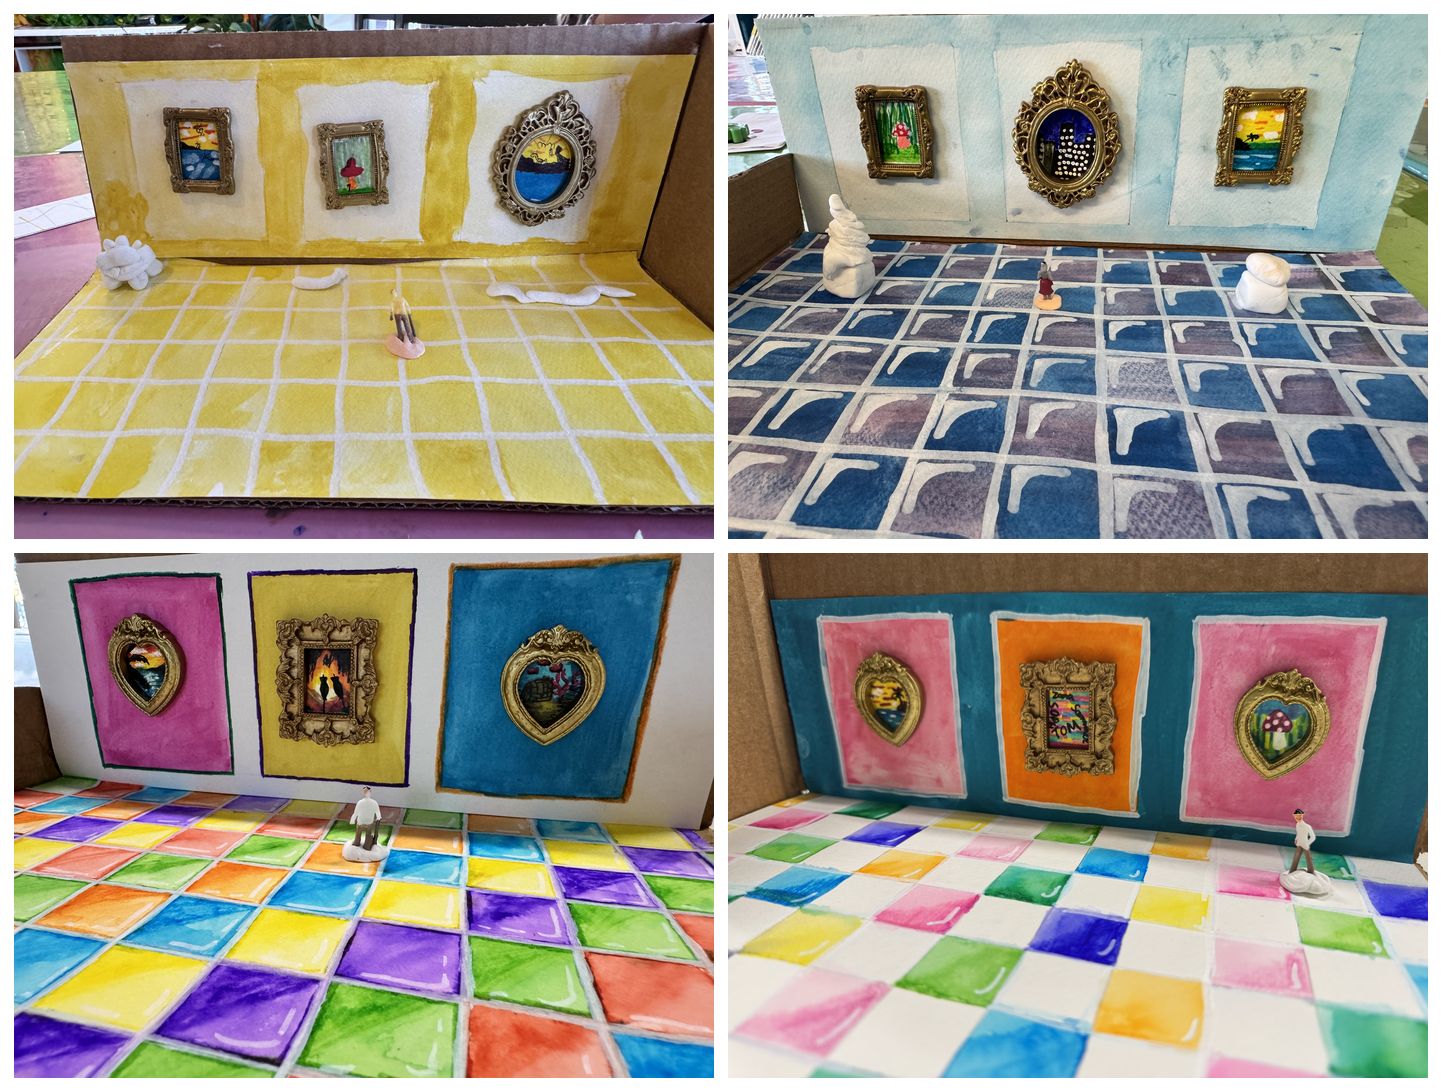
The second project was one of my favourites. The kids built their own mini art galleries. They learned about 3D art, and specifically how to place 2D artworks inside a 3D space. They came back to the theming idea again, and they learned to make very, very small paintings.
Those tiny paintings do a lot of unseen work. Painting small builds fine motor skills, brush control and pencil control, and that carries into every kind of art a child goes on to make, whether it’s a landscape, a person or a creature. We worked with different brushes too, learning how to make a straight line with one and a curved line with another.
We also painted one of the tiny artworks step by step with water-based markers instead of paint. Plenty of kids don’t have paint at home, and we wanted them to see they could recreate this kind of work with a few markers, a brush and a cup of water. If you’ve got water-based markers in a drawer somewhere, your child can do the same: colour a small area, brush over it with a damp paintbrush, and watch the marker turn into paint.
Understanding that art lives in a 3D space is a bigger skill than it sounds. Once a child starts thinking about where a piece will go, they start thinking about whether it fits. When they step back to decide if their tiny canvas looks right on a particular wall of their gallery, they’re practising spatial reasoning. Does this make the room feel cluttered? Does the mood of the painting suit the space? That same mental muscle shows up later when they’re working out whether their week is too crammed, or reading the mood of a room before they walk in. Deciding what belongs where is something they’ll do for the rest of their lives.
And we got a lovely callback to our first project. When we photographed the little galleries, we looked again at how things appear small from far away and big up close. The perspective lesson happened all over again, this time in 3D.
This one’s easy to borrow too. A shoebox, a few postage-stamp-sized drawings and some sticky tape make a gallery. Ask your child where each piece should hang and why.
So, skills or creativity?
Both. Always both. When a child finishes a project like these, they’ve learned something real (perspective, watercolour techniques, fine motor control, how to theme an idea) and they’ve made something that is completely, unmistakably theirs. That’s the whole philosophy at Artlis Studios in a nutshell, and it’s what I’d look for in any art class, wherever you are.
And it all comes home with them
The artwork comes home, and so do the skills. They don’t stay inside a studio. Perspective, brush control, dreaming up and theming their own ideas: all of it transfers to the art your child makes on their own, at the kitchen table or anywhere else. That’s exactly why we did the step-by-step marker painting in the gallery project, so kids could see these are things they can recreate at home with whatever they’ve got. Every project adds to a toolkit they’ll carry into their solo artworks, and into so much of life beyond the page.
Curious what your child is learning?
When a finished project comes home, it’s not always easy to see the skill behind it. You see the lovely end result without seeing what your child had to learn and figure out along the way. That’s completely understandable. Unless you’ve studied art, there’s no reason you’d know what to look for.
A good place to start, wherever your child does art: ask them to show you the trickiest part. Ask what they’d do differently next time. Ask why they picked that colour. Their answers will tell you a lot about what they’ve learned.
If your mini-artist is with us at Artlis Studios, please reach out. Email us, send a message or grab me for a chat. I’ll happily write you a report that breaks down exactly what they learned, in plain everyday words, so you can see the full picture.
Not with us yet? If you’re on the Gold Coast, book a class. If you’re further away, join the waitlist for our online workshops.